Author Topic: A baby is RE-born: BABY PAC restoration project  (Read 65447 times)

zapposh

  • Member
  • **
  • Posts: 207
    • View Profile
    • replay
Re: A baby is born
« Reply #30 on: September 21, 2011, 03:52:05 PM »
Well cleaned, ready to say goodbye to the original paint. I'm amazed, this thing was actually hand painted. You can see and feel the brush strokes.


Then sanding:
First 40 grit, then 120, then 240, then 400.


Et voilĂ :


zapposh

  • Member
  • **
  • Posts: 207
    • View Profile
    • replay
Re: A baby is born
« Reply #31 on: September 21, 2011, 03:59:45 PM »
Forgot to take pictures of that, but repaired the wood cracks with fine wood filler.

Then disassemble all oxydated and rusty parts.


Before / after (treated all posts/screws to a drill with a metallic round brush:


Time to clean off the spinners. Why did they paint the sides white too??? I decide I will not do it that way as the paint WILL come off during playing. Inox will look better.


Fitting new decals to the spinners:


Even the frames are rusty. Every part gets the same treatment. Rust sanded off, then WD-40, vinagre and chrome polish.


zapposh

  • Member
  • **
  • Posts: 207
    • View Profile
    • replay
Re: A baby is born
« Reply #32 on: September 21, 2011, 04:06:23 PM »
Under the playfield all the plastic were black, and I mean really BLACK from the heat of the bulbs over the years, and chicago dust and nicotine and stuff...

While changing every bulb, every translucent color plastic was thoroughly cleaned, cold solders resoldered. This actually to a whole day, as there are so many lights and cables underneath:


Tested every circuit first with the voltmetre, but then the bulbs connections with this self made supermegatestingbatterymachine.
Why? Because even some new batteries were faulty. Some did not work at all, and some worked but with very low intensity.


By the way, many original bulbs were still ok. But filthy, and oxydated contacts, and I read that the first time it's best to replace all of them to avoid trouble.

Then all the plastics got a bath:

Laschek

  • Guest
Re: A baby is born
« Reply #33 on: September 21, 2011, 04:07:39 PM »
Why did sand it down, was it that bad? Looked quite good on the pics...

Etienne MacGyver

  • ArcadeLifeStyler'
  • ***
  • Posts: 7611
  • The Netherlands
    • View Profile
Re: A baby is born
« Reply #34 on: September 21, 2011, 04:14:40 PM »
Yeah, same question here..
would touchups and new mylar just do the trick ?

anyway, it came out perfect!

Makes me want to have a baby pac  ;D

zapposh

  • Member
  • **
  • Posts: 207
    • View Profile
    • replay
Re: A baby is born
« Reply #35 on: September 21, 2011, 04:16:07 PM »
At last came the time to stick the new playfield that arrived from phoenixarcades.

Seriously, it took me over 2 hours just to place the thing without sticking it yet. Why?
Because the back paper of the sticker is so thick you cannot see through! And all transparent circles are printed to fit on the translucent color lightcircles by the mm!!!
So you move 1mm here, then the whole thing goes wrong there.
I ended up using a very strong torch light to shine through the decals and paper, to "project" for example the Pacman "P" onto the lightcircle underneath, carefully lifting up the decal to see if I was well positionned. Did that for virtually every light of the playfield, and finally decided it was ok, so lets go.


Forget about the roll. What you need is that baking silicone tool (the blue one at the top). Works wonders for sticking decals!!! My new best friend (as well as vinagre for cleaning).

Another 2 hours later, and a lot of sweating, the results are in:


A tiiiiiny little air bubble in the top round circle because the part of the plastic was loose, so hard to get the angle right. It wont be seen, nor even played on, but it is the sort of thing that stops me from sleeping at night.

zapposh

  • Member
  • **
  • Posts: 207
    • View Profile
    • replay
Re: A baby is born
« Reply #36 on: September 21, 2011, 04:27:18 PM »
Then time again to flip the board round.

Look at the state of the horrible greasy filthy sticky smelly, well, maybe not smelly, drop down targets. Got NOS ones. Time to replace them.
Like some PC frame boxes, the drop target box cuts like a knife.


Cleaned to whole thing, gave the full monty treatment to every spring over night, and rebuilt the box with all the new targets. Works like a baby a looks wow!:-)


Then rebuilt the flipper coils and mechanics, as the old ones were more dead than dead:


Nice!


Then soldered the lot back to the board, and tested with the supa doopa battery setup (see light bulb replacement). Works! Yes.

Sanded and resprayed the black planks.
Treated all plastics with Novus, and they are almost like new:


And am back to reassembling the playfield, with new rubbers and new balls:


Note that I glued the black planks. Did not want to shoot either screws or anything else into the wood not to break anything. It hold rocksolid. Using Patex Instant Tack.

I will fix the left & right Pac-Man and Ms Pac-Man plastics at the end before re-installing the table, as I will wax the field one last time before it plays.

zapposh

  • Member
  • **
  • Posts: 207
    • View Profile
    • replay
Re: A baby is born
« Reply #37 on: September 21, 2011, 04:32:05 PM »
Yeah, same question here..
would touchups and new mylar just do the trick ?

anyway, it came out perfect!

Makes me want to have a baby pac  ;D

Thanks. You both must know that too: Pics always look better than reality. Believe me, it was unplayable. The woods was actually deformed and cracked open, obviously due to dampness and other harsh treatment. It was very very beaten. I would have saved the original if possible, but here there was no way around as I actually want to play on it (a lot), and otherwise it would have just been good for the museum.

zapposh

  • Member
  • **
  • Posts: 207
    • View Profile
    • replay
Re: A baby is born
« Reply #38 on: September 21, 2011, 04:36:42 PM »
IMPORTANT:

Almost forgot another important fact. As the wood points trough many parts of the playfield, I could not use primer to coat the playfield before adapting the decal.
Used acrylic "lack" varnish spray, in total 4 coats.

First coat sanded down with 400 grit.

The next two sanded with 600 grit. Could not find 600 in the "normal" do it yourself supplies, so they sent me to the car tuning section, where they had 600. What? :-)
Well, if anyone can't find 600, go to the car tuning. An arcade tuning corner would be nice too for such equipment.

Anyway, I did not sand the last layer, as it already had a slight "grainy" touch to it that felt really nice. And it worked well.

zapposh

  • Member
  • **
  • Posts: 207
    • View Profile
    • replay
Re: A baby is born
« Reply #39 on: September 21, 2011, 04:42:35 PM »
By the way, I'd like to change the title to something else, like Estella, or like Baby Pac restoration or something of the sort...

Superully

  • ArcadeLifeStyler'
  • ***
  • Posts: 6300
  • Southern Part of Germany
    • View Profile
Re: A baby is born
« Reply #40 on: September 21, 2011, 05:32:15 PM »
seeing this gives me one more reason to never ever get a pinball - insane number of parts to replace / repair / restore!
all i need is ... PONG - and a select few others: TOUCH ME, DRAGON'S LAIR, JOUST, ROBOTRON, MR DO, SAN FRANCISCO RUSH THE ROCK!!!

level42

  • ArcadeLifeStyler'
  • ***
  • Posts: 13555
  • Ridderkerk, arcade capital of Europe !
    • View Profile
    • Arcade 42
Re: A baby is born
« Reply #41 on: September 21, 2011, 06:18:33 PM »
Man this is hardcore !!! Love it, keep those pics coming ! :)

Etienne MacGyver

  • ArcadeLifeStyler'
  • ***
  • Posts: 7611
  • The Netherlands
    • View Profile
Re: A baby is born
« Reply #42 on: September 21, 2011, 09:09:14 PM »
By the way, I'd like to change the title to something else, like Estella, or like Baby Pac restoration or something of the sort...

just edit your first post  ;)

Etienne MacGyver

  • ArcadeLifeStyler'
  • ***
  • Posts: 7611
  • The Netherlands
    • View Profile
Re: A baby is born
« Reply #43 on: September 21, 2011, 09:10:27 PM »
seeing this gives me one more reason to never ever get a pinball - insane number of parts to replace / repair / restore!

says the man that transforms the most beaten cabs to beautiful pieces again  ;D

zapposh

  • Member
  • **
  • Posts: 207
    • View Profile
    • replay
Re: A baby is RE-born: BABY PAC restoration project
« Reply #44 on: September 26, 2011, 10:26:27 AM »
Ok, next the coin door was up.

Have no close-up pictures really of the "before". No major beatings, but somehow very spotted and some scratches and rust, especially in the return coin compartments and screw areas.
After cleaning the door with half a dozen less aggressive then more aggressive products, impossible the get these strange big spots off. It looked very strange.

I thought I would have to have the whole thing sand blasted and powder coated because it looked horrible. Well, at last I found the magic product:

Industrial grade hand cleaner. This grainy sort of soap mechanics use. After several washes with it and 15 minutes scrubbing, the marks were gone.

The whole door had been stripped.


All parts disassembled, cleaned, polished, sanded and so on. Eject coin buttons were damaged and rusty. Now all is like new again and the eject buttons shine:


Plastics went through Novus and extensive vinagre cleaner treatment and are now awaiting their time of glory again:


Like said, I had rust problems like this in many places:


I decided to go for Hammerite, which is a sort of Rust dissolvent & paint combined, most ofter used to spray already painted outside stuff, like metal gates, garden furniture or heaters in damp areas and so on:


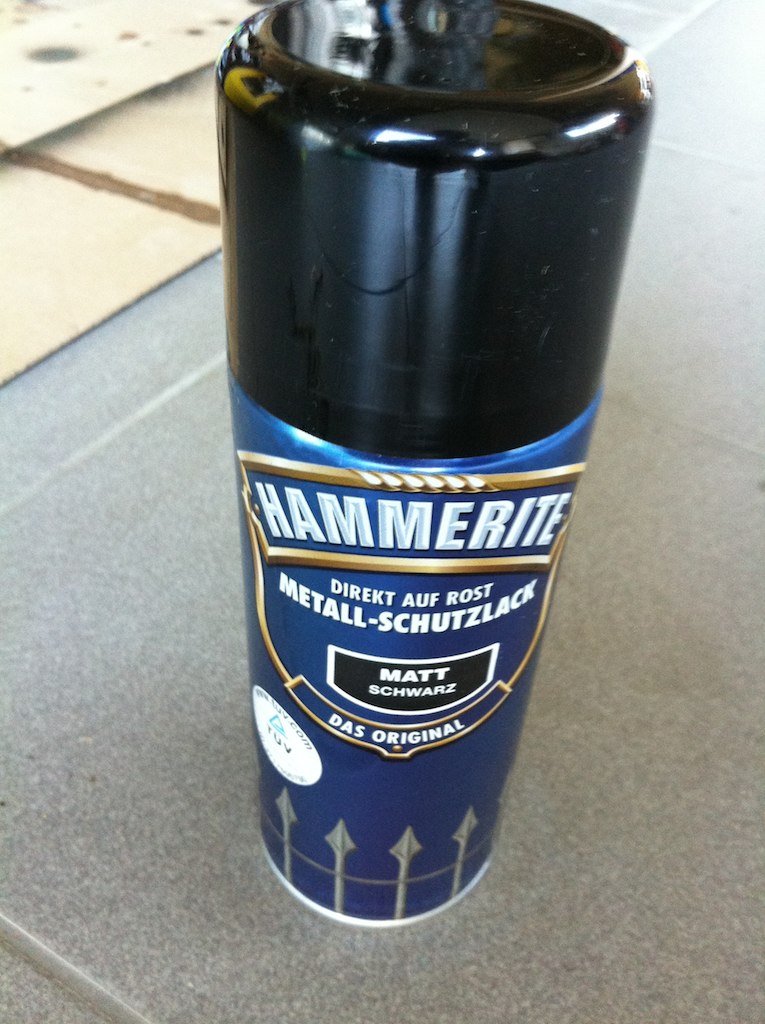
I hate this stuff. It is difficult to work with as very liquid and runs everywhere very fast. But it does do the job. After about 4-5 coats of Hammerite:


Still the chutes to fix. Taping up as I don't want to respray the front of the door:


2 coats right into the chutes and the rust (which I had already beforehand removed and treated with standard rust killer) was gone:


Then reassembled the whole thing, redid the soldering of the lamps and coin arrival slots as most wires were capped off, repaired the "bang-door contact" which was damaged, put a brand new lock, and now the coin door is ready:


There is a tiny hole left on the right side of the lock on the frame, but I'll deal with that later as it will not be sprayed.