OK next you pull back "a couple of inches" of the artwork. This is pretty hard to do alone because of the thinness of the artwork, it's really much easier when someone helps you through the process.
 Untitled
 by
Level_42, on Flickr
Next cut off the backing....
 Untitled
 by
Level_42, on Flickr
Fold back and CAREFULLY stick the uncovered part to the cab. You can see I already got one bubble. If the bubble is really close to the "edge" you can still try pulling back the vinyl a bit, but sometimes I felt it was to risky to do.
 Untitled
 by
Level_42, on Flickr
Now removed the clamps....no way you can change directions anymore now so you're either scoring or fucked

 Untitled
 by
Level_42, on Flickr
Next step is rolling back the artwork and putting a tube under it to keep it clear from the cab. We found out that a rectangular one works just as well, it will slide backwards automatically during the process.
 Untitled
 by
Level_42, on Flickr
Next I tried to go up slowly alone, but it just didn't work well and for sure not easily. Got lots of bubbles. So I asked my wife for help. Pretty rare occasion because we didn't even get into an argument during the process.
It went better as we were at about 1/3 of the cab. Wilma used the squeegee with felt. It didn't seem to make any difference in result, both seem to work well, the cotton covered one my give a bit more "feel" of what you're doing though.
 Untitled
 by
Level_42, on Flickr
Still we had plenty of small bubbles which psyched me out pretty much...
 Untitled
 by
Level_42, on Flickr
BUT, I found a fool-proof solution.
Here is one bubble:
 Untitled
 by
Level_42, on Flickr
Following a tip I got from my dad when doing wall-paper and how to remove bubbles, he said to punch a tiny hole into them (and then inject with some glue, but we skip that here of course). There were so many bubbles that I simply had no choice but to try it:
 Untitled
 by
Level_42, on Flickr
.....and gone ! Absolutely totally invisible !!!
 Untitled
 by
Level_42, on Flickr
No more fear of bubbles !

Took quite some time to do them all but succeeded in doing them all.
Next I got out the heat-gun, on low setting and a fair distance from the vinyl. Then carefully pull on the edges and make a nice fold over the edge.
One word of warning: If you have artwork that is printed with colors up to the edges of the cab DO NOT OVERSTRETCH THE VINYL. It didn't happen to me, but I tried it out on a scrap piece and you will get a light (white) spot if you do it.
Go VERY easy with the heat-gun, never hold it still pointed to the artwork, always keep it moving and point away when you're folding.
You can stick the vinyl to the other side of the cab without problems, as long as you don't press it down it will come off very easily.
 Untitled
 by
Level_42, on Flickr
Then comes the easiest part, trimming it:
 Untitled
 by
Level_42, on Flickr
Do yourself a favor and don't save on a blade for your X-acto knife, use a new one every time. They need to be razor sharp to work well. It's not that important in the T-molding grooves but it is on the backside where the backdoor goes, you want a nice clean and straight cut there. (I also suggest to start there because of this).
This X-acto knife holder I bought at Action by the way, the holder is great and it comes with some blades, but I buy the original X-acto blades because that's the important part.
Untitled by
Level_42, on Flickr
Make it nice and tight as possible, on corners you can't avoid this effect, but since we're covering with T-molding it won't be a problem. Make nice sharp folds like on the right side of the picture, the middle part is still too "loose" here.
 Untitled
 by
Level_42, on Flickr
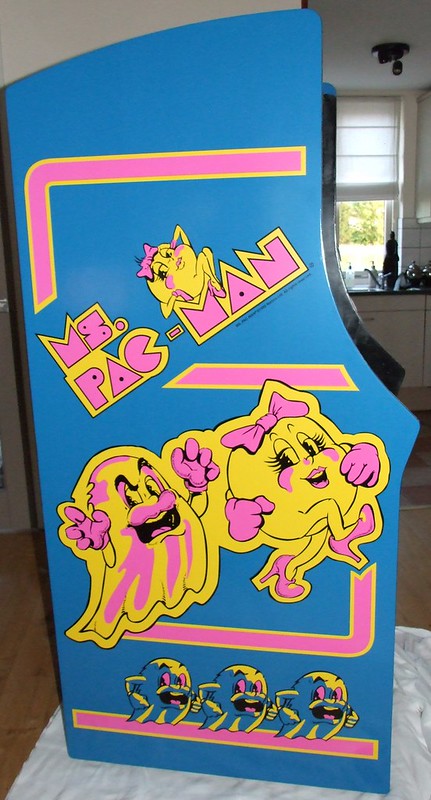
And that's it !
The end result is EXTREMELY rewarding if I may say so myself. I did a much better job on sanding away the bondo and getting this as straight as possible. There may still be some uneven parts but hardly visible and well, I bet the wood wasn't always perfect fresh from the factory either.
I am very very pleased with it:
 Untitled
 by
Level_42, on Flickr


