the restoration continues ...i want this restoration to come together nicely, which means that i don't want to have to wait for one final part of the puzzle forever (which is always the case

). for that reason, i've decided to scan the sideart early on to give the
vector king enough time to work his magic!

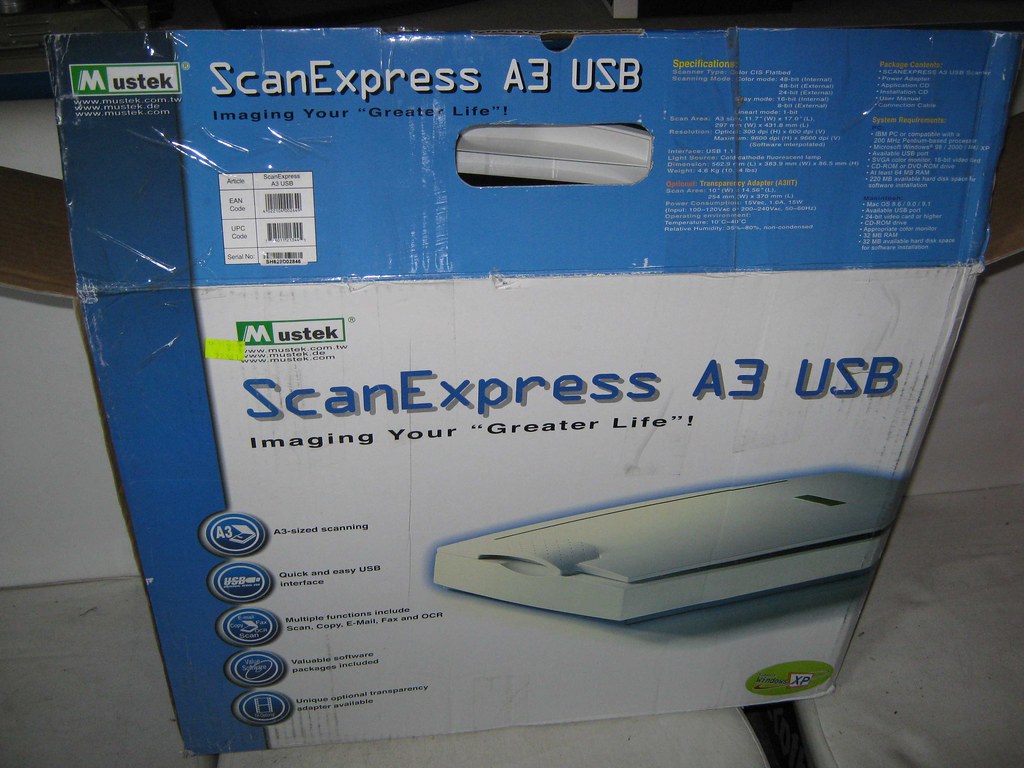
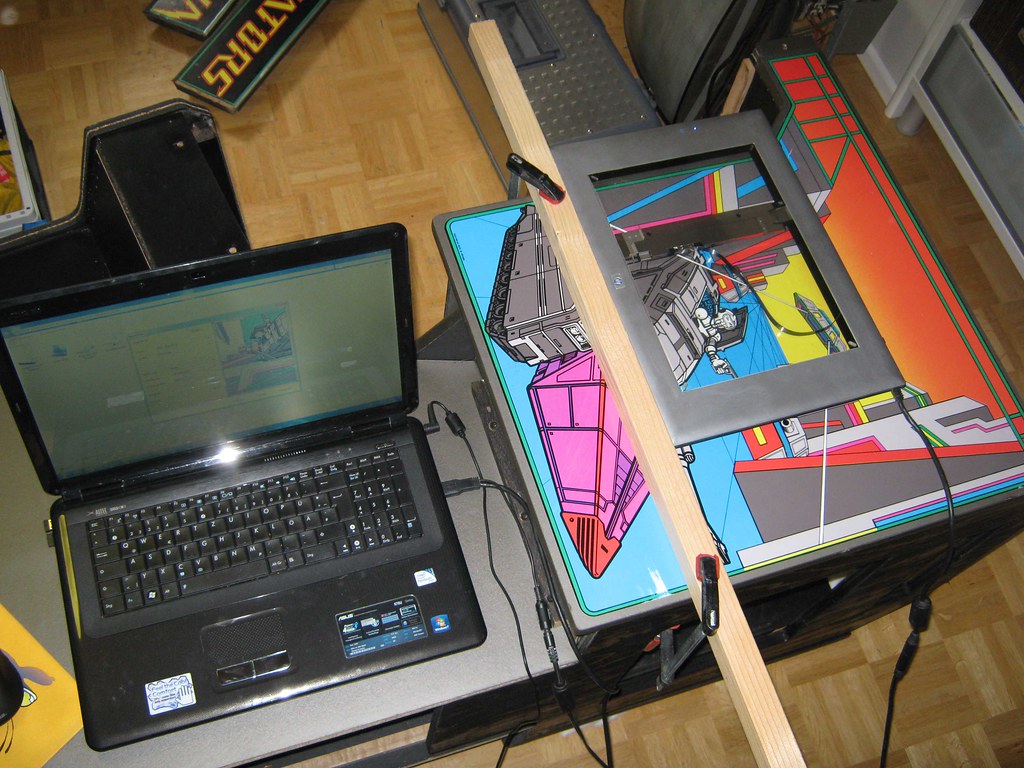
last weekend, i pulled out an old a3 scanner i still had in storage
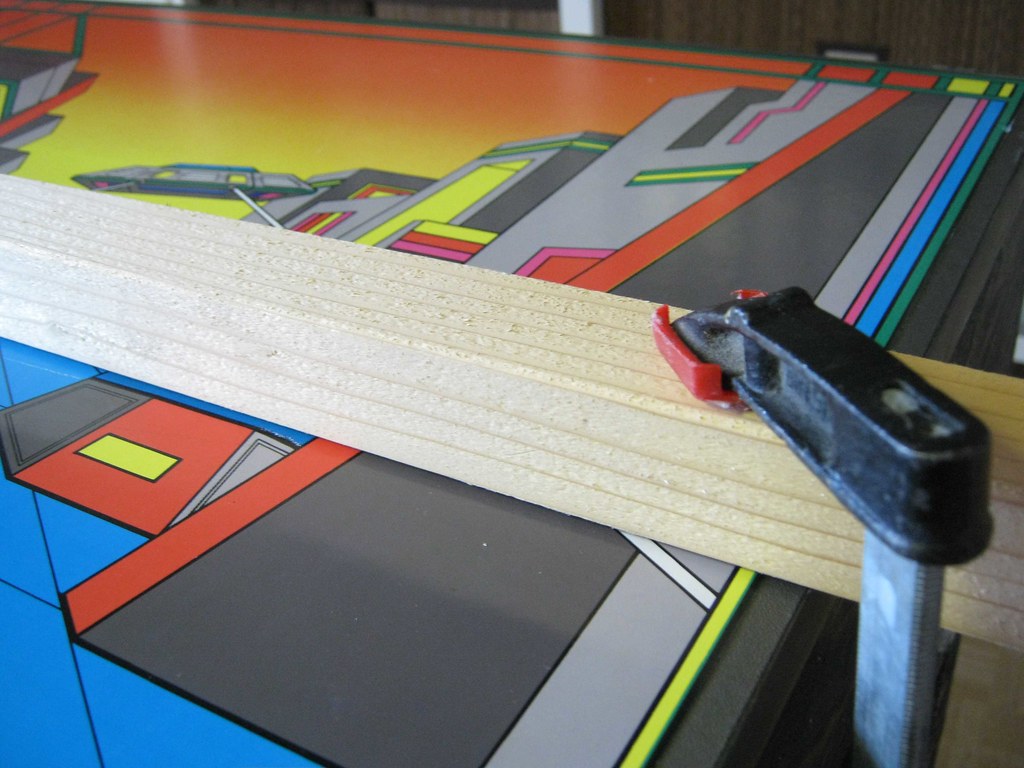
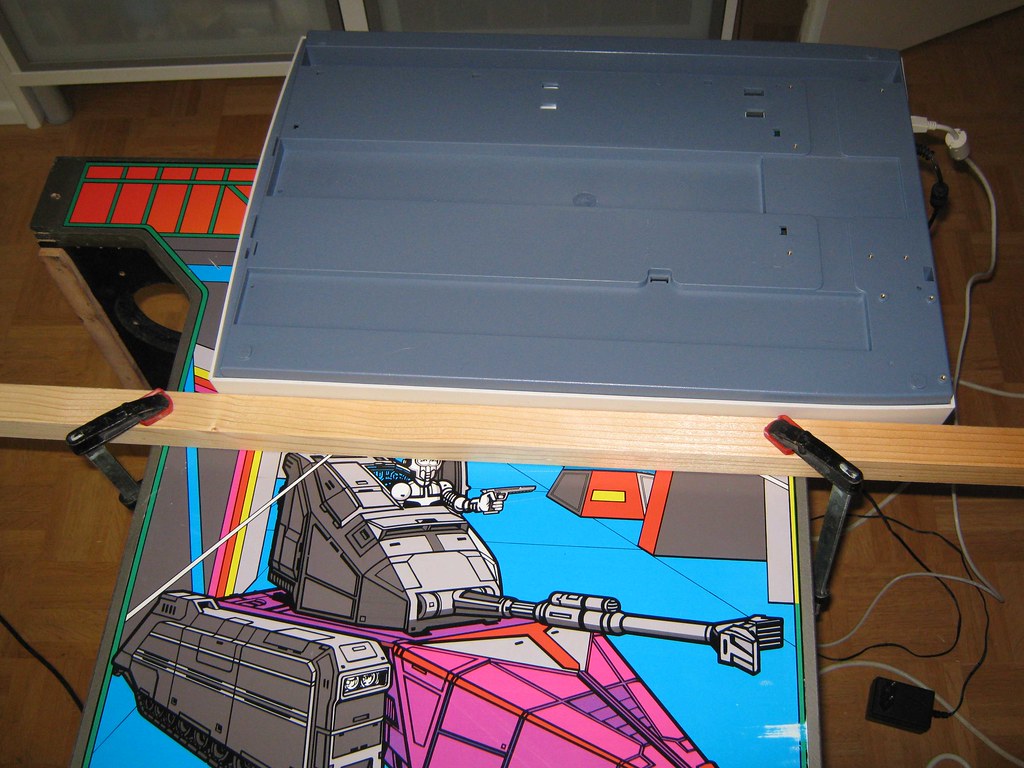
i installed a wooden bar (padded underneath so that the artwork doesn't get damaged) as a guide for an accurate straight scan of the side
let the scanning begin ...
the results are coming in!

with the help of panorama studio, i stitched the individual pieces together and while the resulting file looks nice at first glance, ...

... zooming in reveals a very blurry picture

. the reason for that is simple: the construction of the a3 scanner doesn't allow it to lie entirely flat on the surface, there is always a little space between the object and the scanner glass which results in what you see here


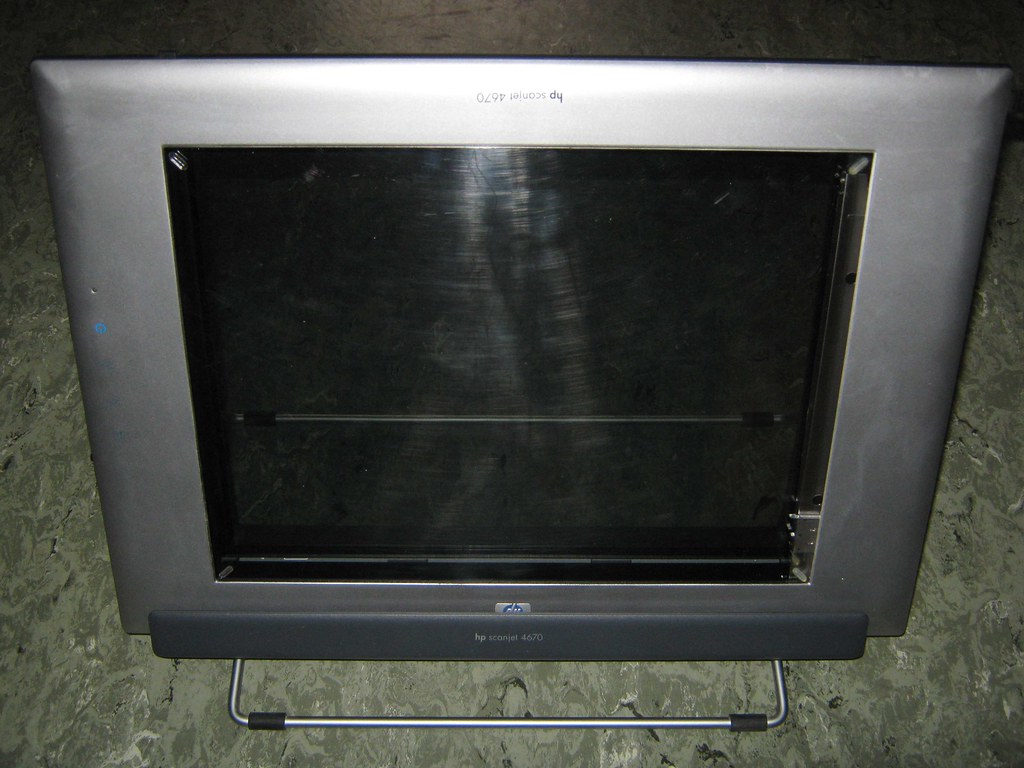
i forwarded the file to etienne to have a closer look and while he told me he could work with it partially, we would never get the desired accurate results - the scanner is simply too old (i couldn't even get it working under windows 7). for that reason, he adviced me to get a new scanner and as far as i know, there's only one logical solution

. a couple of days later, a box was dropped off at my doorstep!
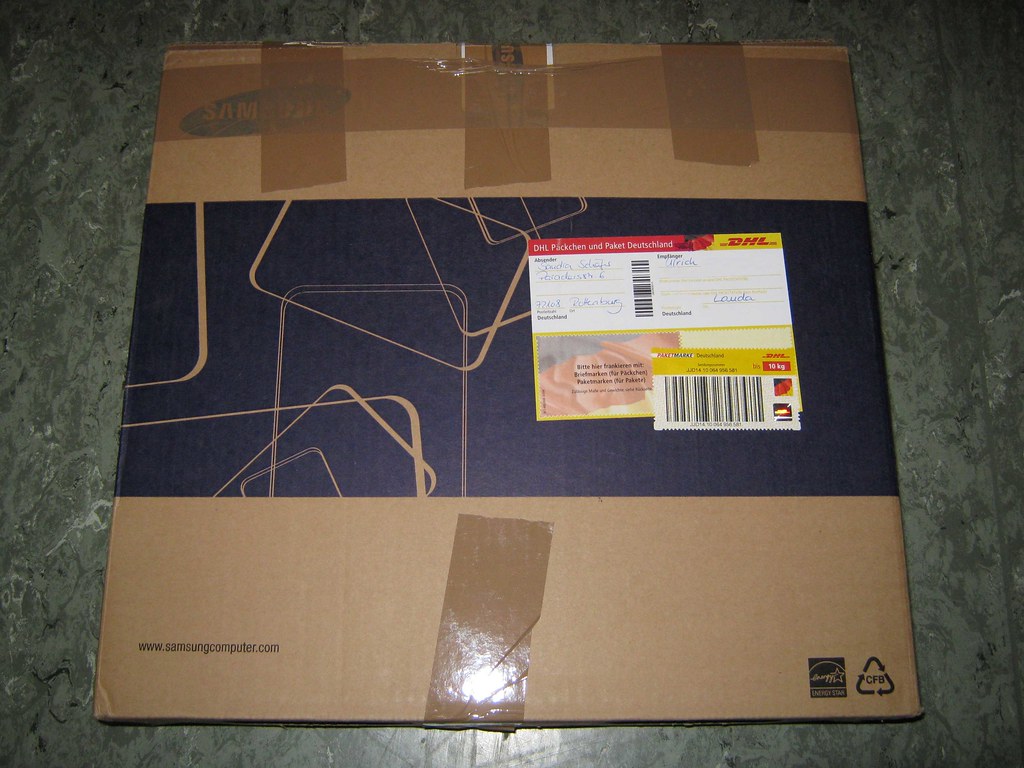
inside, an hp scanjet 4670 - the scanner we've all come to love
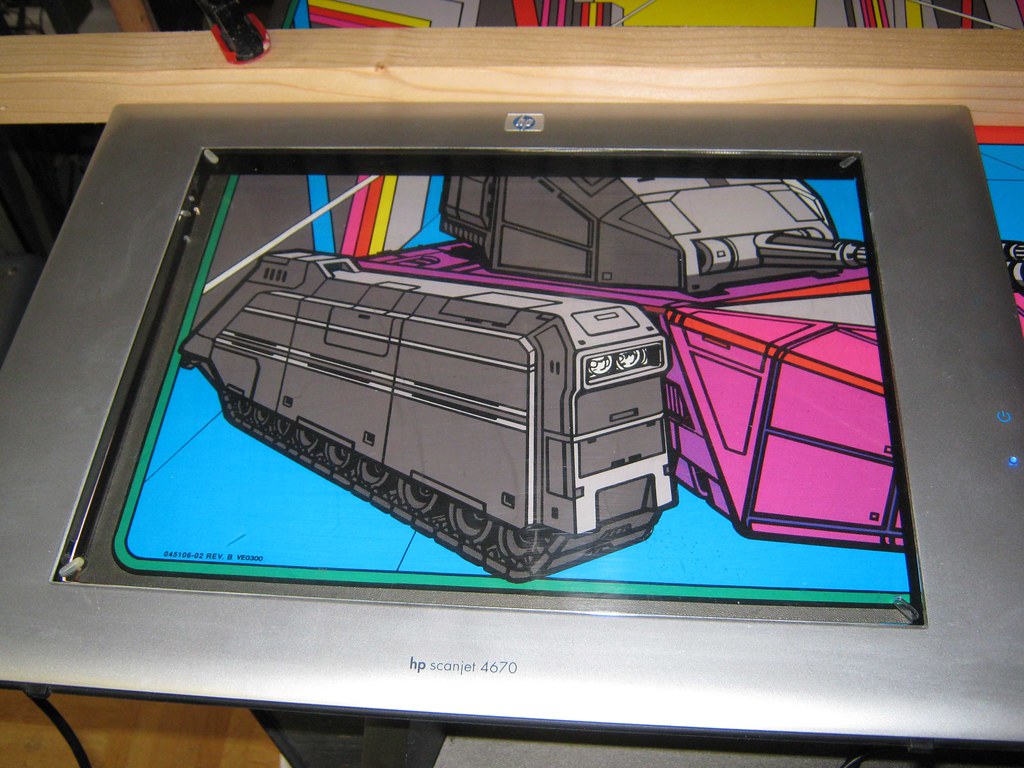
same setup - only one week later
i simply
l-o-v-e that see-through feature of the scanner
and it works under windows 7

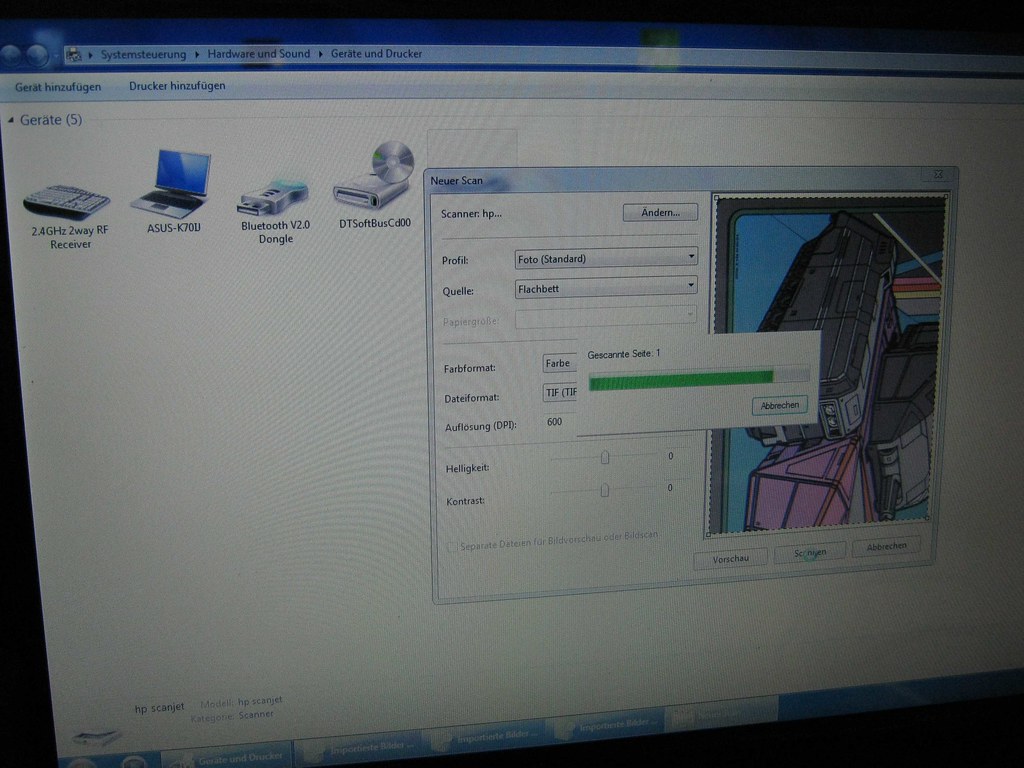
the colors of the scan are much more vibrant
but what about the details?
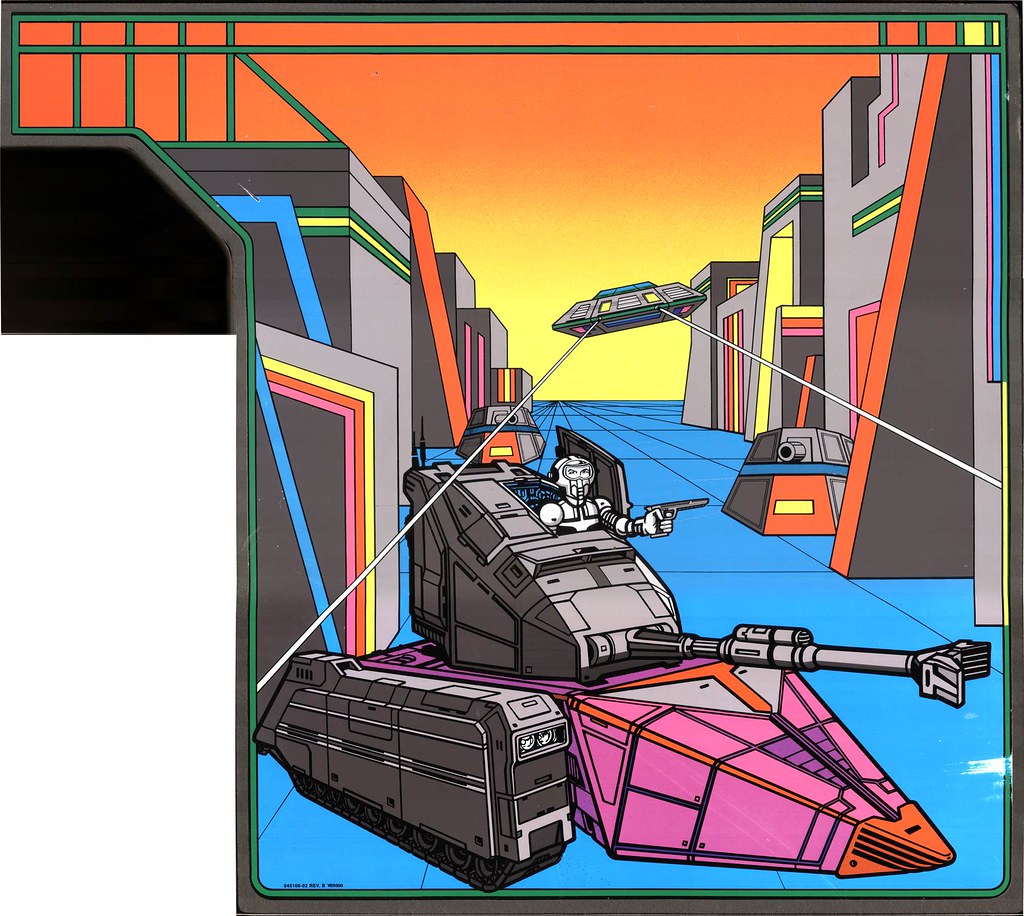
for comparison, let me first show you the a3 scan again (done with the old mustek scanner)
and here are the results (of the german jury) with the newly-aquired hewlett-packard scanner

like day and night! is that good enough to work with, mr vector king?
 to be continued ...


